The Notebook
The notebook is a document that allows as to combine text elements (headings, paragraphs, hyperlinks), equations (LaTeX), figures and interactive code. The notebook uses cells to divide text and code: text is formatted using markdown, and code is executed using the IPython kernel.
Markdown is a simple way to format text; it has a plain text formatting syntax that can be converted easily to HTML. It is easy to learn, check out the syntax in the "Daring Fireball" (by John Gruber) webpage.
How do we start the Jupyter notebook app?
If you follow the installation steps for this workshop listed in the required software markdown, you should have jupyter installed. If not, go to the link and follow the installation requirements.
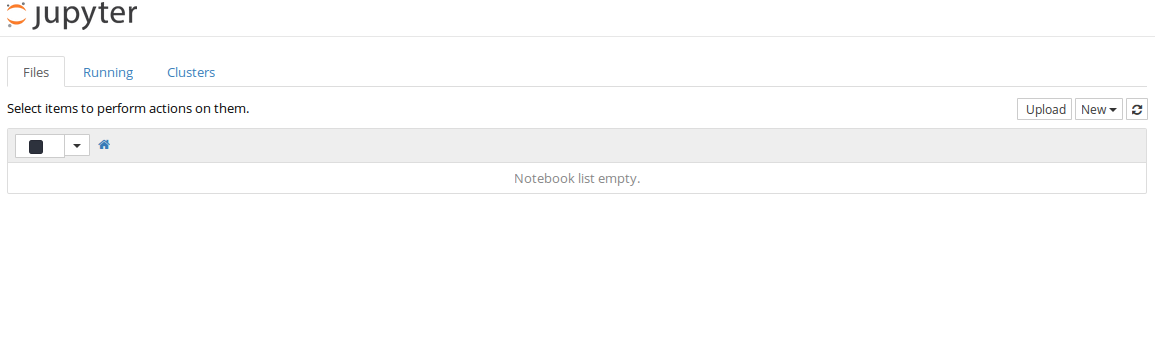
All set? Let's open a terminal and type jupyter notebook hit enter and tadah!!
Your default browser will open with the jupyter app. It should look like this:
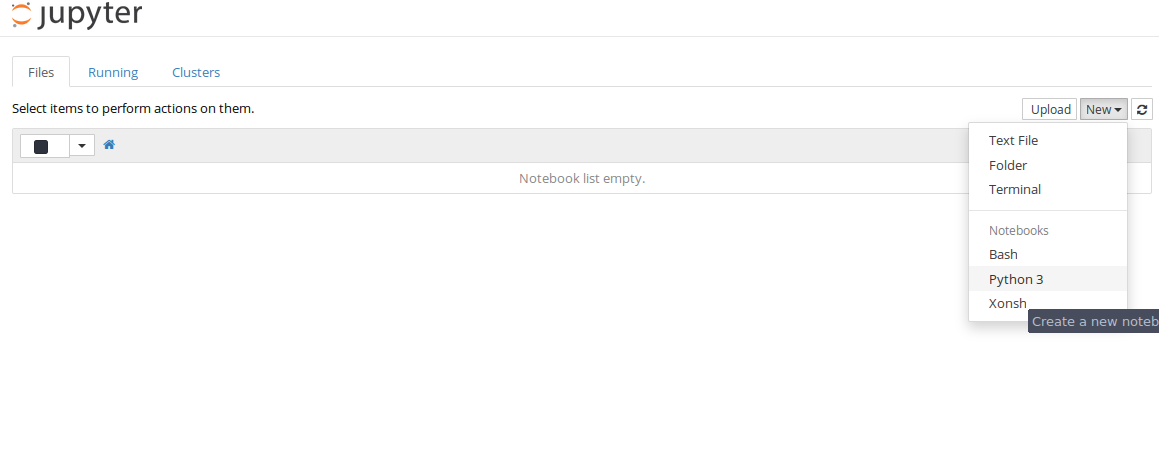
To start a new notebook click on the top right where it says New and click
on Python 3.
A new tab will appear in your browser and you will see:
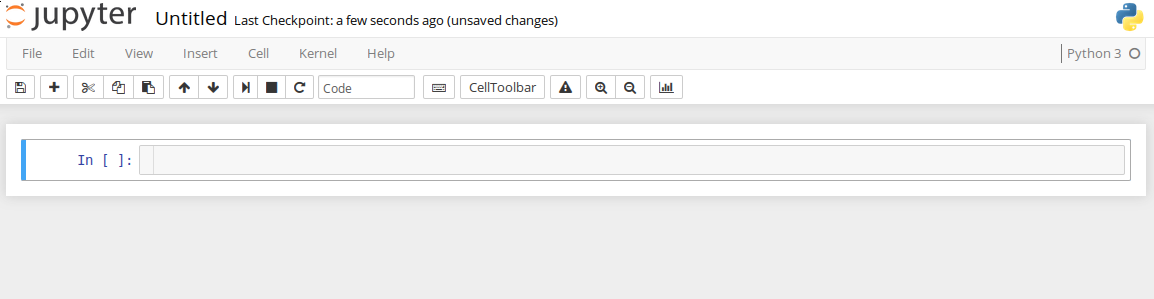
The notebook opens by default with a single empty code cell. Try to write
some Python there and execute the cell by doing [shift] + [enter].
For example:
-
2 * 12 -
print('Hello world') -
x = 5# (notice there will be no output) -
print(x * 'Hi there')
What if we want to add a new cell?
To add a new cell (by default this will be a code cell) press the + button in
tool bar.
What if we want that cell to be a markdown cell?
In the tool bar you can see a dropdown menu that says Code, click there and pick Markdown. Now you can write some text using the markdown syntax and you can write equations using mathjax. (mathjax is a web display engine for mathematics that works in browsers. It supports most LaTeX syntax.)
For example, type in a markdown cell:
$\frac{d}{dx}\left( \int_{0}^{x} f(u)\,du\right)=f(x)$
or
${\frac {d}{dx}}\arctan(\sin({x}^{2}))=-2\,{\frac {\cos({x}^{2})x}{-2+
\left (\cos({x}^{2})\right )^{2}}}$
Cool! ah?
How do we save our work?
-
First, lets pick a name for our notebook. Click where it says Untitled (right next to the Jupyter logo) and pick the name that you want.
-
You save your changes by either clicking in the floppy disk symbol in the tool bar or by doing
[Ctrl] + [s]. This will save in the directory you are located, a.ipynbfile with the name that you pick for your file.
The two different modes: Edit mode and Command mode [1]
Edit mode:
-
We know we are in this mode when we see a green cell border and a prompt showing in the editor area.
-
We enter in edit mode by pressing
Enteror clicking on the cell. -
When we are in edit mode, we can type into the cell, like a normal text editor.
Command mode:
-
We know we are in this mode when we see a grey cell border with a left blue margin.
-
We enter in command mode by pressing
Escor clicking outside the cell's area. -
In command mode the certain keys are mapped to shortcuts that help with common actions.
You can find a list of the shortcuts by selecting Help->Keyboard Shortcuts
from the notebook menu bar. Check them out and have fun!
How we shut down the Kernel?
Once you close your notebook, you will see in the main Jupyter page that your
notebook file has a green book symbol. You should click in the box at the left
of that symbol, and then click where it says shutdown. Finally, go to the
terminal that we use at the beginning to open the jupyter notebook and type
[Ctrl] + [c] and you are all done!
Nbviewer
Nbviewer is a free webservice that allows you to share static html versions of hosted notebook files. If a notebook is publicly available, by giving its url to the Viewer, you should be able to view it [2]. You just need to host the notebook file (.ipynb extension) online and enter the public URL to the file on the nbviewer Go! box. The notebook will be rendered like a static webpage: visitors can read everything, but they cannot interact with the code.
References:
[1] Notebook Basics: Modal Editor
[2] Nbviewer